FitnessSyncer Uploader
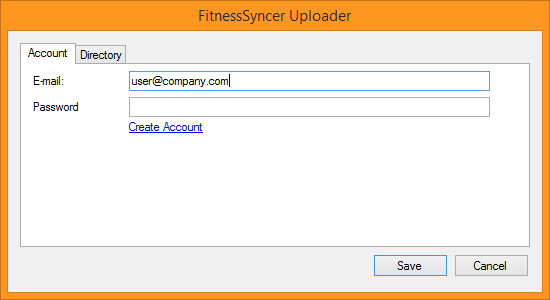
FitnessSyncer Uploader is an application you can install on your Windows or Mac computer to automatically upload your health and fitness information into FitnessSyncer and automatically uploaded into services like Strava. It is useful for devices such as Garmin, Timex, or Magellan, which store their data on your hard drive.
Getting started with FitnessSyncer Uploader is simple:
- Download FitnessSyncer Uploader
- Install the application and start it up
- On the first run, FitnessSyncer Uploader opens its settings
- On the Account tab, choose Sign in. Your browser opens FitnessSyncer, where you sign in the way you always do, including with two-factor authentication, a passkey, or Sign in with Apple or Google, and then allow FitnessSyncer Uploader to add files to your Notebook. When the browser says you can close the window, go back to FitnessSyncer Uploader, which now shows the account you signed in as.
- On the Folders tab, add one or more folders where your FIT, TCX or GPX files are stored. On a Mac, PWX, KML and KMZ files are uploaded too.
- Save
Once saved, FitnessSyncer Uploader will automatically scan the folders and the folders inside them and upload the content to FitnessSyncer Notebook. You can see it in the Stream, Dashboard, or push it to another service using a Sync Destination Task. The Folders tab shows how many files have been uploaded from each folder and when the last one went up.
Signing in
FitnessSyncer Uploader never sees your password. Signing in happens in your browser, and FitnessSyncer Uploader keeps only the sign-in it is given, in Windows protected storage or in your Mac's keychain. You can sign in on more than one computer, and signing in on one leaves the others signed in.
If you do not have a FitnessSyncer account yet, choose Create account on the Account tab instead. Your browser opens the sign-up page, and once your account is created, you allow FitnessSyncer Uploader to add files to your Notebook and it is signed in to your new account. If your browser is already signed in to FitnessSyncer, it asks you to allow FitnessSyncer Uploader for that account instead.
To sign out, open Settings and choose Sign out on the Account tab. Files are not uploaded again until you sign in.
If FitnessSyncer Uploader still asks for your e-mail address and password, it is an older version. You can download the latest version, or enter them there, adding your current two-factor authentication code after your password if you use one. An older version that is already signed in keeps working after you update, until you sign in again through your browser.
The FitnessSyncer Uploader menu
FitnessSyncer Uploader lives in the notification area of the Windows taskbar, or in the menu bar on a Mac. Its menu has:
- A line saying when the last file was uploaded, or that you are not signed in
- Upload a file, to send one file now, whether or not it is in a folder you watch
- Check folders now, to look through your folders straight away instead of waiting for the next check
- Links to your FitnessSyncer Dashboard, Stream, Calendar, Notebook and Account
- Settings, Support, and Exit, which is Quit on a Mac
Are your files on your phone or tablet?
You do not need a computer for this. The FitnessSyncer App can watch a folder for you: on the Sources and Destinations tab, tap Upload, then Choose a Folder, and pick Upload and Keep Watching, or Watch for New Files to leave what is already there. From then on, new FIT, TCX, GPX, PWX, KMZ and KML files in that folder are uploaded to your FitnessSyncer Notebook by themselves. You can also add and remove folders under Settings, Watched Folders, and removing one leaves the files it already uploaded in your Notebook.
- On Android, the folder can be on your phone, on a network share, or in another app that provides folders. FitnessSyncer checks it about once an hour when you have a connection, whenever you open the app, and when you tap Check Now.
- On iOS, the folder can be in iCloud Drive, on a server connected in the Files app, or in another app’s storage. FitnessSyncer checks it when you open the app, from time to time in the background as iOS allows, and when you tap Check Now.
Are your files in the Cloud?
If you have all your files in a Cloud Folder, consider using Amazon S3, DropBox, Google Drive, and OneDrive integrations.
Just have a few?
If you just have a few of these files, you can upload them directly within FitnessSyncer Notebook by clicking the icon or using the FitnessSyncer App and using the Sources and Destination tab to upload files directly into your FitnessSyncer Notebook.
Limitations
- While we support CSV files of your activity from Amazon S3, DropBox, Google Drive, and OneDrive Cloud Storage providers or E-mail, we do not support them from the FitnessSyncer Uploader.
- While you can use FitnessSyncer Uploader to process data from services such as Samsung Health, Fitbit, Garmin, or Strava, you should prefer to use our native integration instead, which usually imports things more reliably and easier for you.
- FitnessSyncer Uploader presently does not support JSON-based exports from Fitbit or Samsung Health. We recommend that you use our native integrations instead.
Where are the logs?
For FitnessSyncer Uploader for Windows, look in your home directory under: AppData\\Roaming\\FitnessSyncerUploader
For FitnessSyncer Uploader for Mac, look in your home directory under Documents/Library/FitnessSyncerUploader.